Description
3BHE021951R0124 Электрический фильтр ABB
CC – Link и другие. Каждый слот IO может быть выбран автономно в соответствии с потребностями клиента, а один модуль поддерживает до 16 каналов.
Технологии основаны на инновациях3BHE021951R0124 Предоставление клиентам высококачественных и надежных продуктов всегда было постоянным стремлением к нулю.
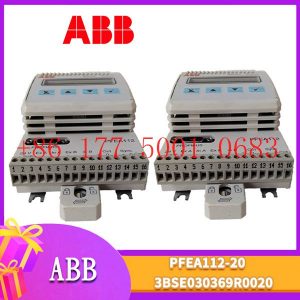
Давайте посмотрим на его инновации и различия с предшественниками: с жидкокристаллическим дисплеем, вы можете увидеть параметры связи, состояние канала IO,
информацию о версии модуля и так далее; 3BHE021951R0124 Отладка и обслуживание более интуитивно понятны; ABS огнестойкая пластиковая оболочка, небольшой размер,
легкий вес, с использованием совершенно новой пряжки монтажной карты, установка более прочная и надежная.
Implementation of communication between ABC industrial robot and PLC based on DeviceNet fieldbus technology
introduction
In modern production systems, industrial robots and PLCs need to communicate and collaborate to complete production tasks. That is, the
industrial robots output signals to the PLC, allowing the PLC to control related equipment to drive the robot”s front-end tools. This article
mainly analyzes the communication problems between ABB industrial robots and PLC based on DeviceNet fieldbus technology.
DeviceNet is a common network communication method in the field of automation. ABB industrial robots establish a network to communicate with
Siemens PLC based on the DeviceNet network.
1Configure DSQC652
There are mainly 5 types of standard I/0 boards commonly used in ABB industrial robots [2]. Except for the different addresses assigned to
them during setup, their configuration methods are basically the same. This article mainly analyzes the ABB standard I/0 board DS0C652, which
mainly builds communication modules based on the DeviceNet network. The DS0C652 board has a distributed I/O module with 16 digital input and 16
digital output interfaces. The board is installed in the ABB industrial robot control cabinet. First, define the specific operation steps of the DS0C652 board,
enter the teach pendant control panel, then enter the configuration menu (Figure 1), select the DeviceNetDevice menu, and add a template to enter Figure 2.
ABB standard I/0 board is hung on the DeviceNet
network, so the address of the module in the network must be set. The jumpers 6 to 12 of terminal x5 are used to determine the address of the module.
The available address range is 10 to 63. Modify the parameters in the template parameters to complete the DS0C652 board settings. Click the drop-down
menu to select the “Use value from template” row, select
“DS0C65224VDCI/0Device”, and then the parameters that need to be set include the address of the I/0 board in the bus.
Figure 1 Configuring DSQC652
2Configure signals and parameters
After completing the DS0C652 board setting, the I/0 signal setting will be performed. Setting the I/0 signal is the basis for establishing communication with
the PLC. The PLC communicates and transmits data with the ABB industrial robot through the I/0 signal and the DS0C652 board. As shown in Figure 3, in the
signal configuration interface, there are many default I/0 points after the system is established. Modification is not allowed. Click “Add” to add signals. When setting
input and output signals, their address range is 0~15. First, enter the signal menu in the configuration options to set the input and output types, and modify the corresponding parameters.
After completing the settings, the computer prompts that you need to restart the settings. If there are multiple signals that need to be defined and the waiting time
is long after restarting multiple times, you can click “Cancel” and wait for all signals to be defined before clicking the “Yes” button to restart. After the signal settings are
completed, click to select “Input and Output” in the ABB menu to check whether all signals have been set.
Figure 2 Configure DSQC652 parameters
Figure 3 Signal parameter settings
During the signal establishment process, attention should be paid to the DSoC652 port and PLC port addresses used, and the corresponding address table should be
established, as shown in Table 1. The robot interacts with the PLC through I/O signals. During the setting process, there must be no errors in the port and address number
of the PLC connected to the DSoC652. If the address is set incorrectly, the communication between the robot and the PLC will not work properly.
The entire robot teaching pendant setting process is shown in Figure 4.
Display operation panel PU512V1 3BSE004736R1
Display operation panel PU512
Display operation panel PU412 3BSE056479R1
Display operation panel PU410K01
Display operation panel PU410
Display operation panel PTPU-01 3HNA006148-001
Display operation panel PTPU-01 3HNA006148-001
Display operation panel PS130/6-75-P
Display operation panel PS130/6-75-P
Display operation panel PR221DS-LSI
Display operation panel PPRU 3HNA021184-001
Display operation panel PPE091A101
Display operation panel PPD539A102 3BHE039770R0102
Display operation panel PPD512A10-454000
Display operation panel PPD512A10-150000
Display operation panel PPD512 A10-15000 3BHE040375R1023
Display operation panel PPD512
Display operation panel PPD115A102
Display operation panel PPD115A01
Display operation panel PPD115
Display operation panel PPD113B03-26-100110
Display operation panel PPD113B03-26-100110
Display operation panel PPD113B03-26-100100
Display operation panel PPD113-B03-10-150000
Display operation panel PPD113B01-10-150000 3BHE023784R0123
Display operation panel PPD113B01-10-150000
Display operation panel PPD113 B03-26-100110
Display operation panel PPD113 3BHE023784R2630
Display operation panel PPD113
Display operation panel PPD103-B03-10-150000
Display operation panel PPCC322BE HIEE300900R0001
Display operation panel PPC907BE101 3BHE024577R0101
Display operation panel PPC907BE101 3BHE010751R0101
Display operation panel PPC907BE101
Display operation panel PPC907BE101
Display operation panel PPC907BE 3BHE024577R0101
Display operation panel PPC907BE 3BHE024577R0101
Display operation panel PPC907BE
Display operation panel PPC907BE
Display operation panel PPC907BE
Display operation panel PPC905AE101 3BHE014070R0101
Display operation panel PPC905AE101 3BHE014070R0101
Display operation panel PPC905AE101
Display operation panel PPC905AE101
Display operation panel PPC902CE101
Display operation panel PPC902AE101 3BHE010751R0101
Display operation panel PPC902AE101 3BHE010751R0101
Display operation panel PPC380AE102 HIEE300885R0102
Display operation panel PPC380AE102
Display operation panel PPC380AE02 HIEE300885R0102
Display operation panel PPC380AE02
Display operation panel PPC380AE01 HIEE300885R0001
Display operation panel PPC322BE HIEE300900R0001
Display operation panel PPC322BE
Display operation panel PPC322 HIEE300900R0001
Display operation panel PPC222A02
Display operation panel PPB022DE01 HIEE300867R0001
Display operation panel PPA322B HIEE300016R2 HIEE400235R1
Display operation panel PPA322B HIEE300016R2 HIEE400235R1
Display operation panel PP886H 3BSE069297R1
Display operation panel PP885 3BSE069276R1
Display operation panel PP885
Display operation panel PP883 3BSE092979R1
Display operation panel PP881 3BSE092978R1
Display operation panel PP881
Display operation panel PP877K
Display operation panel PP877 3BSE069272R2
Display operation panel pp877 3bse069272r2
Display operation panel PP877
Display operation panel PP875 3BSE092977R1
Display operation panel PP875
Display operation panel PP874
Display operation panel PP871
Display operation panel PP865A 3BSE042236R2
Display operation panel PP865A 3BSE042236R2
Display operation panel PP865A
Display operation panel PP865 3BSE042236R1
Display operation panel PP865
Display operation panel PP846A 3BSE042238R2
Display operation panel PP846A 3BSE042238R2
Display operation panel PP846A
Display operation panel PP846A


Reviews
There are no reviews yet.